GetGenerative.ai User Documentation Guide
This guide provides step-by-step instructions to help you get started, manage your account, and use GetGenerative.ai’s AI Agents for end-to-end Salesforce implementation and delivery.
With this guide, you’ll be able to navigate and leverage GetGenerative.ai’s capabilities to streamline proposal creation, solution design, project execution, and post-go-live support.
What Does GetGenerative.ai Do?
GetGenerative.ai is an AI-native Salesforce implementation platform that uses six modular AI Agents to automate up to 80% of the project lifecycle — from discovery to go-live and support.
Whether you’re crafting proposals, designing solutions, writing code, or managing test cycles, GetGenerative.ai helps you deliver projects faster, more consistently, and with fewer handoffs.
Supported Agents:
- Pre-Sales
- Design
- Build
- Code
- Test
- Support (Beta)
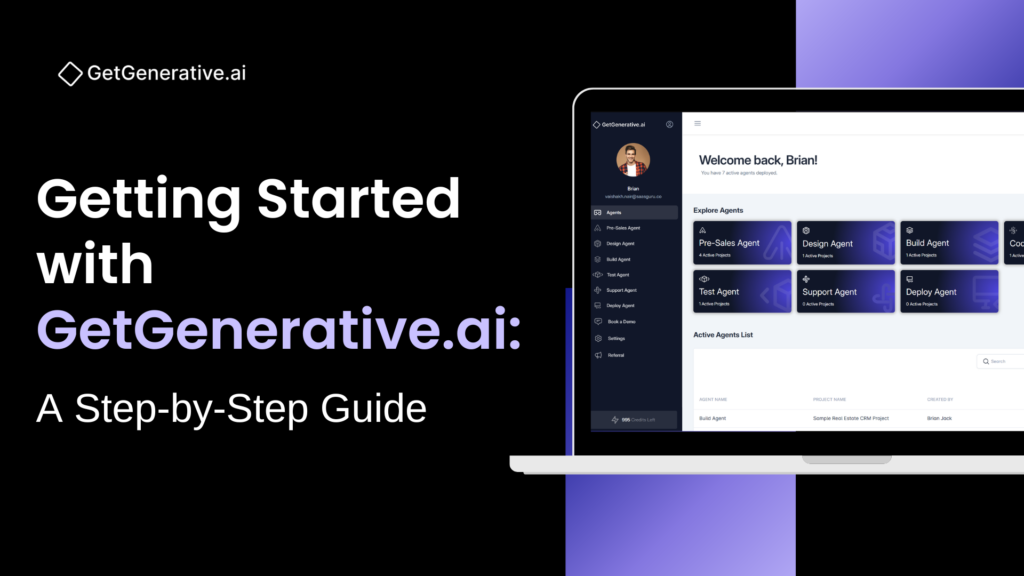
GetGenerative.ai Dashboard
Upon logging in, the dashboard acts as your command center.

From here, you can:
Create and manage proposals
Track progress across active projects
Launch and review outputs from AI Agents
GetGenerative.ai Agents
The platform supports the following AI Agents, each tailored to a specific stage of the Salesforce project lifecycle:
1. Pre-Sales Agent
Enrich needs analysis, automate proposal creation, and optimize solution design.

Capabilities:
Automated Proposal Creation: Generate complete proposals with executive summary, detailed scope, out-of-scope items, expected outcomes, and project challenges.
Effort & Timeline Estimation: AI-driven estimates for development hours, cost, and high-level timelines.
Proposal Input Quality Score: Automatically evaluate input completeness and offer suggestions to improve.
Document AI Integration: Use Document AI to tag, chat with, and extract insights from uploaded RFPs, SoWs, or internal notes.
Metadata Analysis: Connect your Salesforce org to extract 50+ metadata types. Search and explore metadata, code (Apex, triggers, LWCs), and even chat with your org context (e.g., “Explain my lead conversion flow”).
Proposal Sharing: Share proposals with internal teams or clients, with view/edit permissions.
Analytics Dashboard: Track KPIs like Total Hours, Total Value (USD), and Total Weeks saved per proposal.

Click here for the Proposal Creation Guide
2. Design Agent
Transform approved proposals into structured user stories, detailed acceptance criteria, and solution blueprints.

Capabilities:
Project Initialization: Start a new project from scratch or convert an existing Pre-Sales proposal with auto-imported scope.
User Story Generation: Auto-generate structured user stories using the INVEST model; fully mapped to themes, epics, clouds, and releases.
Acceptance Criteria & Assumptions: AI-generated acceptance criteria with citations based on feature assumptions.
Low-Level Solution Generation: Generate story-level and epic-level technical solutions aligned with Salesforce best practices.
Traceability: Maintain mapping between stories, features, and solution components.
Manual Edits & Reorganization: Add, edit, or move stories and epics as needed; regenerate solutions as scope evolves.
JIRA Integration: Sync stories with JIRA (manual or bulk).
Support for Discovery Tools: Access Document AI, Metadata, and Discovery AI to support detailed discovery and documentation.
3. Build Agent
Accelerates Salesforce implementation with solution design, code and configuration.

Capabilities:
Workbook Generation: Automatically produce an implementation workbook from finalized Design Agent output.
Task Categorization: Classify items as Configuration (flows, validations, security) or Customization (Apex, LWC, triggers).
Action Mapping: Label tasks as New, Update, or Delete based on metadata analysis.
Developer Notes: Auto-generate detailed build steps and assumptions for each configuration item.
Metadata Validation: Compare design intent with actual Salesforce org metadata and flag discrepancies.
Org Readiness Overview: View count of config/custom tasks, plus status indicators.
Code Base Tab: Separate view for customization-related tasks leading to Code Agent workflows.
Delivery Checklist: Export a unified workbook view of all configuration/customization items across epics and stories.
4. Code Agent
Turn validated user stories into production-grade Apex, LWC, and triggers using an AI-powered coding assistant


Capabilities:
Org Connectivity: Connect your Salesforce dev org to enable direct deployment and code refresh.
Best Practice Review: Align developers with company-wide coding guidelines across Apex, LWC, VF, etc.
Code Generation: Generate Apex classes, triggers, LWCs, or pages using auto-filled context from user stories, developer notes, and workbook items.
Smart Editing: Use AI-powered chat to add logic, optimize performance, or explain existing code.
File Management: Apply, edit, and compare changes across single or multiple files.
Testing Support: Auto-generate test classes, run tests, and track code coverage.
Version Control: Sync with org, save backups locally, and detect changes in existing files.
5. Test Agent
Create and manage test plans, generate test cases, execute runs, and track defects with full traceability.

Capabilities:
Test Plan Setup: Start from scratch or convert Design Agent projects to bring in all user stories and criteria.
Test Case Generation: Generate 15+ types of test cases (UAT, integration, regression, negative, etc.) mapped to device types and acceptance criteria.
Manual Test Case Management: Edit, organize, and prioritize cases with full metadata and execution instructions.
Test Runs: Define runs, execute step-by-step flows, and log outcomes (Pass/Fail/Blocked).
Defect Management: Raise defects within runs, attach evidence, and track defect status.
JIRA Integration: Sync test cases and defects as sub-tasks and bugs under linked stories.
Dashboards & Reporting: View real-time test progress — passed, failed, retest, untested.
Book a 1:1 Demo
The Book a 1:1 Demo feature allows you to schedule a personalized walkthrough of GetGenerative.ai with a platform expert.
This session is tailored to your specific needs — whether you’re exploring AI-driven proposal automation, need guidance on project planning, or want to see how the agents work together in real-time.
Steps to Book Your 1:1 Demo
Step 1: Navigate to the Demo Booking Section
Log in to your GetGenerative.ai account.
On the dashboard, locate and click “Book a Demo” in the main menu or homepage.

Step 2: Select a Time and Date
On the booking page:
Choose a preferred date from the available calendar.
Select a time slot that works for your schedule.
All times are displayed in your local timezone.
If no slots are available, browse future dates.

Step 3: Enter Your Details
Provide additional context or specific questions you want to address in the session.
This helps the demo expert tailor the walkthrough to your goals.

Step 4: Confirm Your Booking
Click Schedule Event to finalize.
You’ll receive a confirmation email that includes:
- The date and time of your demo
- A join link (e.g., Zoom, Teams)
- Any preparation instructions, if applicable
Benefits of a 1:1 Demo
Personalized Experience: Get a walkthrough focused on your specific use case or industry.
Live Q&A: Engage directly with a product expert and get real-time answers to your questions.
Full Feature Overview: Understand how GetGenerative.ai supports everything from pre-sales to go-live.
Tips to Maximize Your Demo
Prepare Questions: Think about what you’d like to explore, such as proposal generation, test automation, integrations, or agent workflows.
Test Your Setup: Ensure your internet connection and device are working smoothly.
Follow Up: After the session, review the materials shared and reach out for onboarding or deeper technical support if needed.
Settings: Step-by-Step Instructions
The Settings section in GetGenerative.ai allows you to configure your account, manage subscriptions, monitor your credit usage, personalize your profile, and maintain secure access. Follow this guide to update your profile, billing information, and company details efficiently.
Account Setup & Profile Management
Keep your profile updated to ensure your details appear correctly across proposals, shared workspaces, and collaboration tools.
Step 1: Edit Your Profile Information
1. Access Your Profile
- Log in to your GetGenerative.ai account
- Navigate to Settings > Account

2. Complete Your Profile Fields
- First Name and Last Name
- Title (e.g., Consultant, Developer)
- Company Name
- Workspace – View and switch between your active workspaces. You can now create and manage multiple workspaces, each with its own team, project set, and data context.
- About (optional): Brief summary of your role or expertise

3. Upload Profile Picture
- Click the profile icon to upload a photo and personalize your account
4. Enter Personal Contact Info
- Email Address
- Phone Number (optional)
- Country: Select from the dropdown
- Language: Choose your preferred language
- LinkedIn: Add your profile URL for enhanced visibility

Step 2: Save Your Changes
- After filling out the form, click Save
Your updates will reflect across your dashboard, proposals, and shared content.
Security Settings
Maintain secure access by managing your password from the Security tab.
Step 1: Navigate to Security Settings
- Go to Settings > Security
Step 2: Change Password
- Enter your new password.
- Set a new password that meets platform security standards (e.g., minimum character length, special characters)

Subscription Plan & Billing
Manage your billing details, subscription type, and payment methods under Plan & Billing.
Step 1: Access Plan & Billing
Navigate to Settings > Plan & Billing
Step 2: Choose or Update Your Plan
You can select from the following plans:
Free Plan
A no-cost option to explore the platform. Includes 1,000 credits—enough to create one full proposal and test core features.
Note: No overage allowed.
Pro Plan
Best for individuals or teams scaling productivity. Includes 10,000 annual credits per user, access to all agents, team management tools, and usage analytics.
Price: $50/month, billed annually
Enterprise Plan
Designed for organizations needing advanced functionality like custom integrations, private LLMs, enhanced security, and dedicated support.
Contact the sales team to customize this plan.

Click the respective button to:
- View your current plan
- Upgrade Plan to Pro
- Contact Sales for Enterprise
Step 3: Manage Payment Method
- Click Manage Payment
- Enter or update your payment information (e.g., credit card)
- Click Save to apply changes
Step 4: Review Billing History
- View past invoices and receipts directly in your billing dashboard
- Download Invoice next to any transaction to save for your records
View Usage
Track your platform activity, credit usage, and patterns over time.

Access: Go to Settings > View Usage
- Credit Overview:
Shows total credits, available balance, and used credits
Includes current plan and last update time
- Usage History:
Filter by User, Action, Agent, or search by project
See detailed logs of when and how credits were used


- Credits Usage Overview:
Graph showing usage over time (7 days, 15 days, 1 month, 3 months)

- Recharge & Buy Credits:
Use Buy Credits to top up manually
Enable Auto Recharge to automate credit refills when low
Company Information Management
Standardizing company details ensures consistent branding and legal clarity across all proposals.
Step 1: Update Company Details
- Navigate to Settings > Company Information
- Fill in:
- Company Name
- Address
- Primary Contact Information
- Company Name
These details will auto-populate in your proposals for consistency.

Step 2: Define Company Overview and Terms
- Company Overview
Provide a brief description of your company’s mission, services, or value proposition. This appears in the “About Us” section of proposals. - Terms & Conditions
Upload or enter your organization’s standard terms and conditions

These will be embedded automatically into all proposals — no manual copy-paste required.
Accessing Additional Support
The Help section in GetGenerative.ai provides built-in resources to help you navigate and make the most of the platform’s features. You can access support tools at any time from the top-right corner of the dashboard.

Use the Product Tour
Ideal for new users or anyone exploring advanced features.
Steps to Launch the Tour:
- Click the Question Mark (?) icon in the top-right corner of the dashboard.
- Select Product Tour from the dropdown menu.
- Follow the guided walkthrough to explore key features and workflows step by step.

Submit Feedback
Help shape the future of GetGenerative.ai by sharing your experience.

Steps to Submit Feedback:
- Click the Question Mark (?) icon in the top-right corner.
- Select Feedback from the Help options.
- Fill out the feedback form with:
- Suggestions
- Bug reports
- Feature requests
- Click Submit to send your feedback directly to the product team.
Your insights help us continuously improve the platform to better serve your needs.
Frequently Asked Questions (FAQs)
1. How long does it take for each agent to generate outputs?
On average, each agent delivers results within 3 to 5 minutes. This duration includes processing uploaded documents, understanding contextual input, mapping requirements to the appropriate Salesforce clouds or products, and generating multi-layered outputs such as themes, user stories, and proposed solutions.
2. What input formats are supported?
You can upload files in JPG, PNG, PDF, DOC, PPT, and TXT formats. The platform is built for multimodal input processing, allowing you to drag and drop images, presentations, transcripts, or raw meeting notes. The AI extracts meaningful content from each format and consolidates it into a unified requirement structure.
3. What document formats can be downloaded?
Currently, proposals and project documents can be exported in Word (.docx) and PDF formats. These downloads maintain clean formatting, include customizable sections (like “About Us” and “Terms & Conditions”), and follow a consistent layout. PPTX export is in the product roadmap for pitch decks and executive presentations.