How to Use the Design Agent in GetGenerative.ai: A Step-by-Step Guide
The Design Agent is your go-to workspace once a Salesforce project transitions from proposal to delivery. Tailored for business analysts, solution consultants, and functional architects, the Design Agent bridges discovery with implementation.
It helps teams conduct structured discovery sessions, generate detailed user stories with acceptance criteria, and map low-level solutions aligned with Salesforce best practices.
Whether you’re starting from scratch or continuing from a Pre-Sales proposal, the Design Agent streamlines the path from business requirement to technical specification – all while ensuring consistency, clarity, and cross-platform collaboration.
Key Capabilities
- Conduct guided discovery sessions
- Generate detailed user stories and acceptance criteria using the INVEST model
- Design low-level Salesforce solutions
- Map stories to themes, epics, clouds, and releases
- Sync user stories and solutions with JIRA
- Collaborate across teams with inline editing and tagging
- Leverage supporting tools like Document AI, Metadata AI, and Discovery AI
When to Use the Design Agent
- After a proposal is approved and the delivery phase begins
- During discovery workshops with business stakeholders
- When preparing configuration-ready stories for technical teams
- Before syncing requirements and stories with tools like JIRA
Getting Started with the Design Agent
Step 1: Launch the Design Agent
Navigate to the Design Agent tab from your GetGenerative.ai dashboard and click Start New Project with AI.

You’ll be prompted to choose how you want to start:
- Create New Project: Create a new project by inputting your customer details, business objectives, and initial scope.
- Start from an Existing Proposal: Convert a completed proposal (created using the Pre-Sales Agent) into a full Design Project.
Note: When converting a proposal, all related data—Themes, Epics, Features, Scope, and Challenges—will automatically carry over. The system generates the full design workspace within 3–5 minutes.

In this case, we are starting with an existing proposal that was previously created using the Pre-Sales Agent.

Once the project is ready, click on “View Project”.

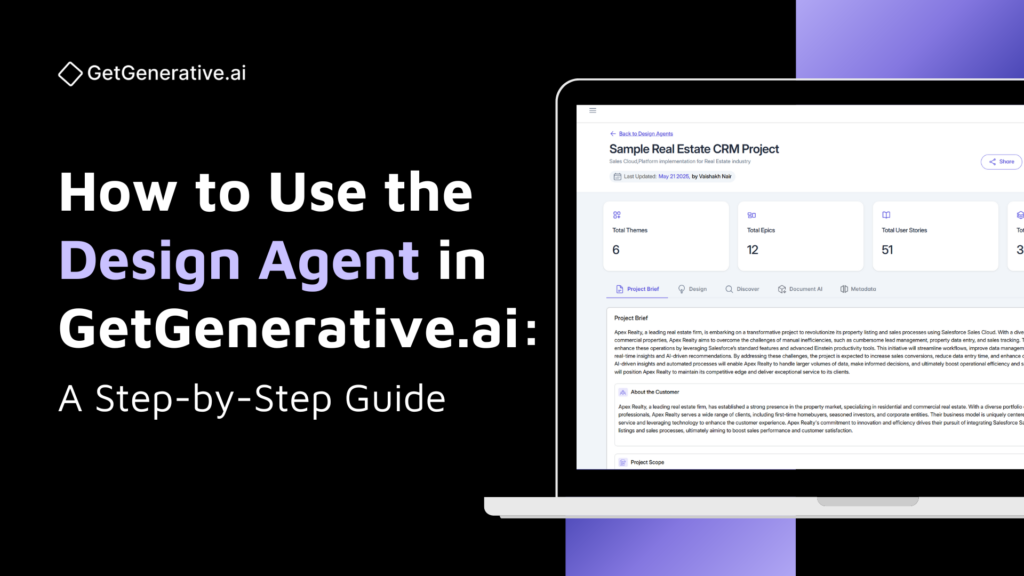
Step 2: Load and Review the Project Brief
If you’re using a proposal as your starting point, the Project Brief is preloaded. It provides context for the entire delivery team and includes:
- Customer Overview
- Project Scope
- Expected Outcomes
- Project Challenges
- Out of Scope
This brief ensures alignment between Pre-Sales and Delivery teams, giving you a consistent foundation across agents.

Step 3: Explore the Design Section
Once the project is initialized, you’ll enter the Workspace View in design section, which displays:
Themes (high-level business areas)
Epics (groupings of related features)
Features (key functionalities scoped in Pre-Sales)

User Stories (automatically generated using AI)
High-Level Solutions – (Strategic proposals from Pre-Sales)

Low-Level Solutions – (Technical solutions mapped to each story)

Here you can edit all the solutions appearing in the workspace of the design section.
Step 4: Manage Requirements in Requirements View
The Requirements View lets you categorize and refine your project’s structure using themes, epics, and feature-level requirements. Key Features:
- Add Theme / Epic / Requirement: Use the buttons at the top to create new elements and expand your project scope.
- Search Bar & Filters: Easily find requirements using filters for Themes, Epics, or Release tags.
- Inline Editing: Click into any item to edit or add more detail.
- Expandable Hierarchy: View nested levels like Case Management → Case Routing → Requirement.
- Requirement Tags: Each requirement is labeled and tied to relevant releases.

Step 5: Generate and Manage User Stories
In the User Stories View of the Design Agent, each Feature from your epics is broken down into actionable user stories using the INVEST framework (Independent, Negotiable, Valuable, Estimable, Small, Testable). This view allows you to create, view, and manage these stories with full traceability across Themes, Epics, Clouds, and Releases.

Add and View User Stories
Click Add User Story to manually create a new story.
Each story includes:
- Story ID (auto-generated)
- Title written in user-centric format (e.g., “As a user, I want…”)
- Mapped Theme, Epic, Release, and Cloud
- Editable Priority, Status, and Tags
- Details such as Created On and Created By
Editing a User Story
Click on a story to open the full editing modal. You can modify:

- Title – Written in standard user story format (“As a user, I want…”)
- Theme, Epic, Release, Priority, Status, and Cloud
- Tags – Add contextual labels for filtering and search
Acceptance Criteria
Located under the Description field, these are auto-generated and fully editable:
- Clearly defined testable conditions for when the story is considered complete
- Based on referenced feature assumptions

Low-Level Solution
Each story can include a Low-Level Solution:
- AI-suggested implementation steps tailored to the user story
- Includes technical configuration, automation logic, and key assumptions
- Click Regenerate Solution to update based on any revised criteria or description

Attachments
You can upload documents, images, or links to enrich the user story context using the Upload File option.
This structured view ensures that each user story is implementation-ready, testable, and traceable throughout the project lifecycle.
Step 6: Generate Low-Level Solutions
Once your stories are validated:
- Click Generate Low-Level Solution to let the AI produce technical solutioning mapped to Salesforce modules.
- You can generate solutions at two levels:
- User Story Level: For granular control
- Epic Level (recommended): Allows deduplication across stories and ensures consistency
Each low-level solution includes:
- Proposed Salesforce Module/Submodule
- Complexity Estimate
- Effort in Hours
- Solution Description and Justification
Step 6: Edit, Move, or Regenerate
You have full control over all elements:
- Manually add, edit, or delete Themes, Epics, Features, or User Stories
- Move stories or features across Epics or Themes as needed
- Regenerate low-level solutions whenever Acceptance Criteria or business inputs change
Step 7: Integrate with JIRA
To enable real-time project tracking and execution:
Click Integrate JIRA
- Log in with your JIRA credentials
- Select your Site and Project
Map platform fields (Theme, Epic, Story, Status) to JIRA fields
Once set up:
- A Sync button appears next to each user story
- Click Sync to send the story to JIRA
- The button changes to View, allowing you to open the JIRA issue directly
You can sync stories one-by-one or all at once. If JIRA was previously integrated via the Pre-Sales or Build Agent, the connection carries over.
Step 8: Use Supporting AI Tools
To enrich your project inputs, the Design Agent provides access to supporting agents:
- Document AI: Extract requirements and insights from discovery documents
- Metadata AI: Import and interpret metadata from your connected Salesforce org
- Discovery AI: Identify gaps, suggest improvements, and track input quality
These tools are fully embedded within the Design Agent and help you run comprehensive discovery sessions and build implementation-ready documentation.
Step 9: Collaborate with Your Team
- Use the Share button to invite collaborators
- Assign roles (e.g., Editor, Viewer)
- Enable real-time co-editing across teams (Sales, BA, PM, Dev)
This ensures stakeholders stay aligned as the project transitions from discovery to delivery.
FAQs
1. Do I need Pre-Sales data to use the Design Agent?
No. You can start from scratch or convert an existing proposal. If starting fresh, just input basic customer and scope info to allow the system to generate themes, epics, and stories.
2. Can I regenerate low-level solutions?
Yes. Regeneration can happen at both user story and epic levels. Epic-level generation is preferred for deduplication and cohesive planning.
3. Is manual editing allowed for any component?
Absolutely. You can manually add or edit anything—Themes, Epics, Features, Stories—along with custom fields, tags, and assignments.
4. Can I integrate tools other than JIRA?
Native support is available for JIRA. Custom integrations with ClickUp, Monday.com, etc., can be configured during onboarding.
5. Can I configure field mappings in JIRA?
Yes. You can define how stories, themes, statuses, and other metadata are mapped to your JIRA fields for accurate sync and traceability.